How to Change Pool Filter Sand
Efficient, inexpensive, low-maintenance pool filtering is always the goal. You don’t want to spend all your time and money just ensuring your filter does what it should. That’s probably why you have a sand pool filter in the first place. They rarely clog, are easy on your wallet and your back, and work well. You get crystal clear pool water, and the most work you have to do is swap out the sand once every few years.
How do you change pool filter sand, anyway? Start by deciding which sand you’ll use—you have a few options. Learn how to tell when it’s time for a change so you won’t constantly battle dirty, cloudy water. When you’re ready to tackle it, change your sand and return to swimming quickly.
What is Pool Filter Sand?
Dead bugs. Bacteria. Algae. Your pool filter traps these things so they can’t hang around making the water cloudy or getting swimmers sick. The filter media is the stuff that grabs those contaminants. In this case, sand is that media.
Sand is such excellent filtration media, it’s used in other water safety applications such as wastewater treatment, septic systems, and even for drinking water.
To the untrained eye, most sand looks pretty much the same, so you might think all sand is created equal, but that’s not the case. Don’t be tempted by that bag of cheap play sand in your garage. It will destroy your filtration system. Always make sure to use one of three types of sand in your pool filter.
Silica Sand
The most commonly used pool filter sand is #20 silica sand. It comes from ground quartz, which creates sharp silica grains with jagged edges excellent for trapping particulates from passing water.
Silica sand is mined, not manufactured.
Glass Sand
If you’re looking for filter media with low environmental impact, glass sand is an effective alternative to silica. It’s made from 100% recycled glass and is smooth to the touch, but still captures particles as small as two microns—that’s one millionth of a meter.
The glass grains are all different sizes, so it minimizes channeling, which occurs when pool water cuts a path straight through the sand and slips through the filter virtually unfiltered. Glass sand also has a negative charge, so it excels at capturing iron and manganese particles. This is especially helpful if your pool is filled from a hard water source.
Zeolite Sand
Created from volcanic rock minerals called zeolites, this silica alternative boasts 100 times greater surface area than standard filter sand because of its sponge-like honeycomb shape.
Zeolite chemically traps chloramines—the chlorine byproducts that sting swimmers’ eyes—through a process called molecular sieving. That’s a fancy way of saying chloramines become trapped inside the zeolite sand particles indefinitely.
If you’re finding you need to shock your pool frequently, zeolite sand could help get chloramines under control without having to use as many pool chemical additives.
Pool Filter Balls
Filter balls are specifically designed to substitute traditional pool sand filters. Only 2.9 lbs of filter balls provide the same functionality as 100 lbs of filter sand.
The spherical fiber filter, composed of materials such as polyester, polypropylene, and acrylic fiber, is notable for its high filtration strength and speed, alongside its impressive lifespan and reusability.
One distinctive advantage of this filter ball is that it doesn’t clog your filter and requires less backwashing for maintenance, leading to extended filter life. It makes a viable replacement for other media such as filter sand or glass.
Filter Balls to be super easy to manage, 100x lighter than sand filter media and it improved circulation and filtration, with lower filter pressure and higher flow rate. Eliminate hauling and disposal of hundreds of pounds of sand.
Why Change Your Pool Filter Sand?
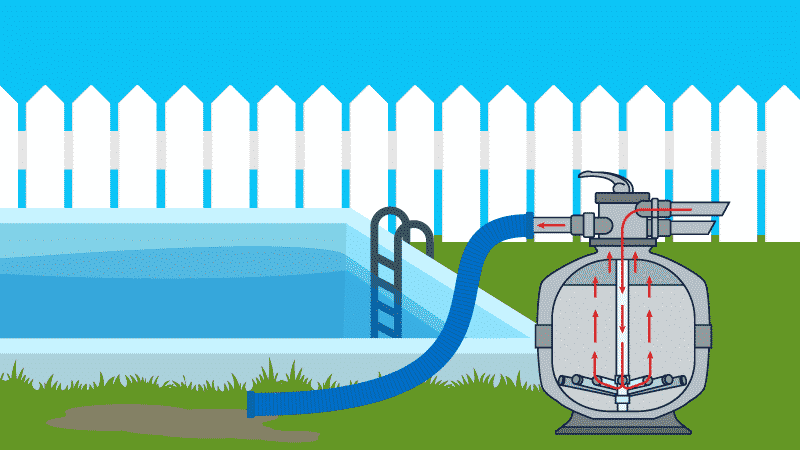
The pool pump pulls dirty water to the filter, where it passes through the sand, where contaminants get trapped. The clean water flows back into the pool. How exactly does the sand hold onto the icky stuff, while allowing the cleaned water to pass through?
Though it’s much too small to see with the naked eye, all three types of sand have a rough surface where contaminants get caught as the water flows past.
Over time, the rushing water wears away the prickly surface of the sand, leaving it smooth and round. When you look at sand from beaches with intense waves under a microscope, it’s noticeably smoother than sand from calmer beaches. The same principle applies to pool filter sand, which has water flushed through it for several hours a day.
This smoothing is the result of a process called weathering. Ironically the same process that creates sand also wears it down into dust, useless for filtering anything.
When pool filter sand is weathered smooth, it doesn’t have any jagged edges to grab and hold contaminants. Your pool may start to look cloudy or require more frequent shock treatment as the filter media nears the end of its lifespan.
When to Change the Sand in Your Filter
Like fine wine, pool filter sand gets better with age, but then it peaks and eventually declines. Its lifespan is rather short—just three to five years. Over the course of a few years, contaminants build up in the sand.
For the first couple of years, this actually enhances the filtering ability of the sand because in addition the sand’s own rough edges, the contaminants building up also act as filtration for the water that passes through the filter.
But eventually, all that extra gunk builds up so much that it makes the filter prone to clogs. At the same time, weathering renders the sand incapable of collecting more contaminants. Your filter’s efficiency drops, and your pools water quality suffers.
Two other things may happen when your sand is past its peak. Pressure can build up inside your filter as it becomes more difficult for the water to pass through gunked-up sand. Then the water may seek a path of least resistance and cut a channel through the sand, which may reduce some of the pressure, but will virtually eliminate filtering.
Can’t I just Clean or Backwash my Sand Filter?
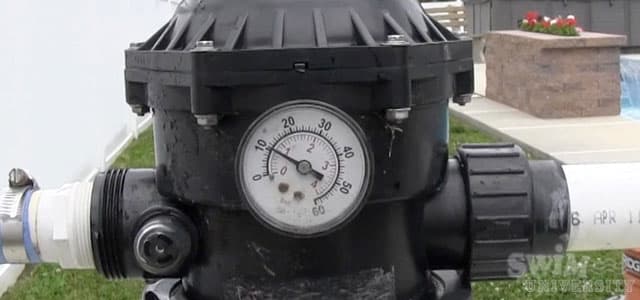
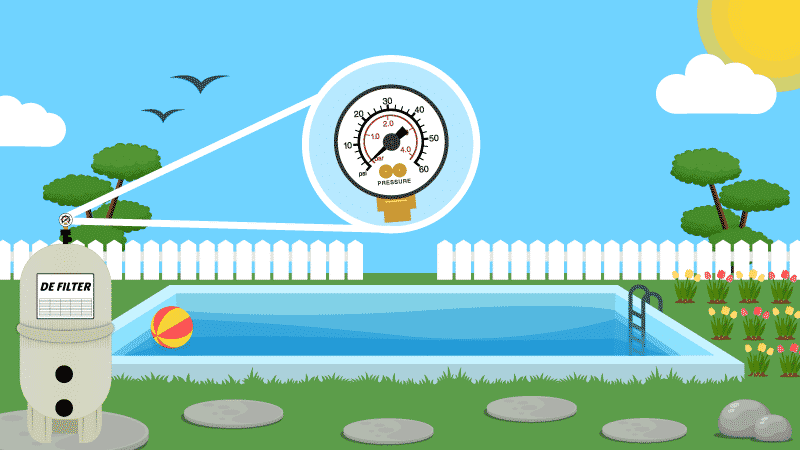
You’ll need to backwash your sand filter whenever the pressure gauge climbs to 10 pounds per square inch (psi) higher than the normal running pressure. You can also backwash if the water is a bit cloudy, but the chemistry is okay.
Backwashing rinses the sand, flushing debris to waste. It can be done as part of your routine pool maintenance, and you may need to top off the pool afterward.
If you want to give your sand a little extra cleaning, use sand filter cleaner annually. Think of this stuff as a degreaser for the sand. It helps wash out oils and other contaminants backwashing can’t quite get rid of.
Both backwashing and filter cleaner help with climbing pressure and water clarity, but eventually the sand will wear down and need to be replaced. If your sand is in the three- to five-year window, and pressure and clarity are ongoing problems, it’s probably time for new sand.
The Changing of the Sand
Once you’ve determined your filter is the reason for your cloudy water, get your gear together for sand changing. You’ll be amazed how easy this is.
You’ll Need:
- Hacksaw (if pipe needs to be cut)
- Shop-Vac
- Screwdriver
- Garden hose
- Flashlight
- pool filter sand (check your filter’s manual for the amount)
- Duct tape or Rubber plug
- Utility knife
- Chemical Mask
- Backwash hose
- Diatomaceous earth (D.E.) powder (optional)
1. Turn Off the Pump and Drain the Filter
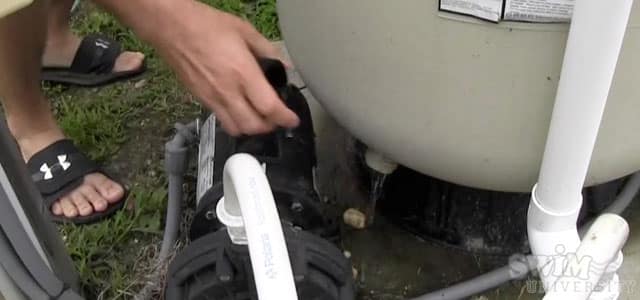
Turn off the filter and pump. Be sure the timer isn’t set to turn on soon so the pump won’t kick on while everything is disconnected. If the pump kicks on while dry, it may burn out.
Remove the drain plug from the bottom of the filter tank, and let all the water drain out.
Tip: Draining the filter tank may take a while, so you could do this step in the morning, then come back in the cooler evening air to finish the rest.
2. Remove the Multiport Valve
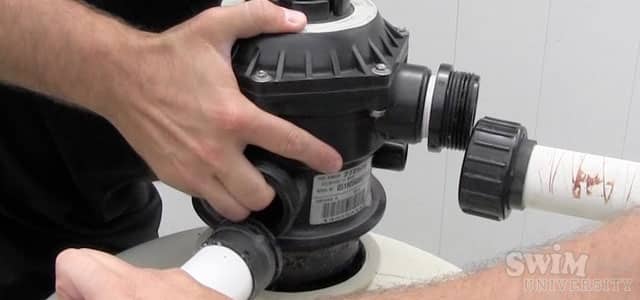
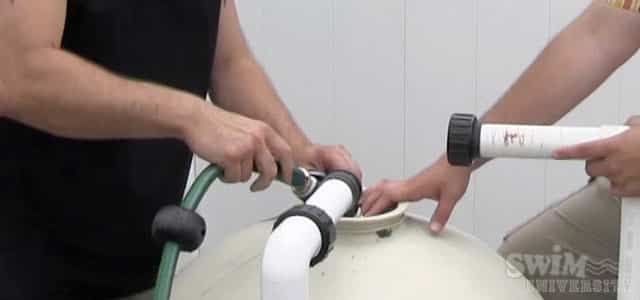
Remove the hoses or pipes that are connected to the multiport valve. If your valve is hard plumbed with PVC pipe, you’ll have to cut the pipe. If you’re uncomfortable doing this, consider hiring a pro.
After the pipes have been cut, you (or a pro) can install union fittings so next time around, you’ll only have to unscrew a pipe fitting—no hacksaw required.
Use your screwdriver to remove the clamp or collar securing the valve to the tank.
Gently twist then pull up on the multiport valve to remove it.
Tip: The pipe attached to the valve has laterals (like tree roots) branching out into the sand. The combination of weight from sand and twisting can break the laterals, so take it easy.
3. Cover the Standpipe
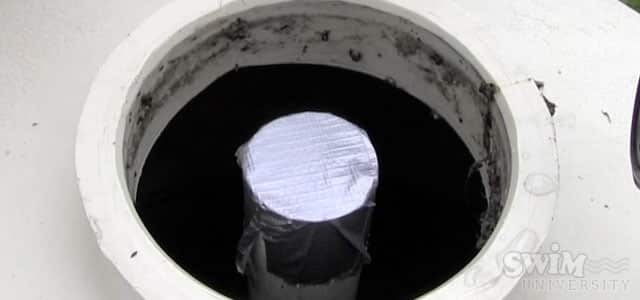
Inside the tank is an open pipe where the valve was just removed. Cover it with duct tape to prevent sand from getting inside. If it does, that sand will get flushed right into your pool when you start up the pump again.
4. Remove the Sand
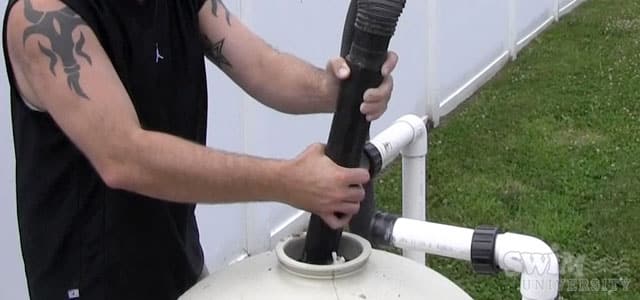
Use the Shop-Vac to suck out all the old sand. If you don’t have a Shop-Vac (or you’re a big fan of back pain), you can scoop the old sand out by hand with a plastic cup. This will take forever and ever.
Make friends with someone who has a Shop-Vac you can borrow, or just invest in one. It will take less time, and they come in handy for a lot of other jobs.
A shop-vac is essential for removing water from your hot tub or pool.
5. Rinse Out the Tank and Laterals
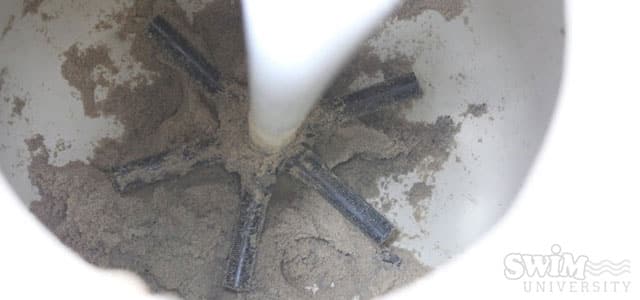
With most of the sand gone, you’ll be able to see the arms branching out of the standpipe. Use your garden hose to rinse any remaining sand out of the drain hole.
Use the flashlight to carefully inspect the standpipe and laterals for damage. Any cracks could let sand into your pool, so make necessary repairs before adding fresh sand.
6. Fill the Tank Halfway with Water
Replace the drain plug in the tank. Stick the hose down into the tank and start filling. Center the standpipe and laterals, and hold them in place while the tank fills about halfway.
Adding some water prior to the replacement sand creates a cushion to protect the laterals from the weight of falling sand.
This garden hose features all-weather flexibility and an abrasion-resistant outer cover with crush-resistant anodized aircraft aluminum fittings, making it extremely durable.
7. Add the New Sand
Put your mask on to avoid breathing in dust. Check the duct tape on the standpipe and add more if necessary.
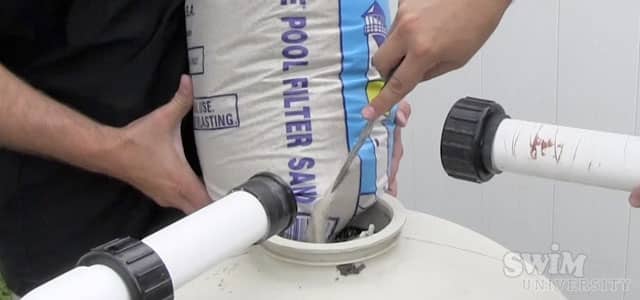
Holding the bag with a corner extending over the opening of the tank, slice it open with the utility knife. Relax, enjoy the Zen moment, watching the sand drain into the tank. Just don’t relax too much—you’re holding a 50 lb. bag of sand.
Add one bag of sand at a time, letting it slowly pour into the tank so it won’t spill everywhere.
Important: Only use pool filter sand or filter sand substitute. Anything else can ruin your filter.
Tip: You can further increase the filtering efficiency of sand by adding a few cups of D.E. powder along with the fresh sand.
Our perfectly sized pool filter sand filters out insects, leaves, dirt, dust, sunscreen oiled, hair & other small particles to keep your pool sparkling clean. This pool filter sand is specifically designed to meet the standards for all brands of pool filters.
8. Fill the Tank and Reassemble the Connections
When all the sand is in the tank, fill it to the top with water. Replace the multiport valve, collar, and pipes or hoses. Make sure all the fittings are snug and secure.
9. Backwash and Rinse the Filter
Attach the backwash hose and turn the multiport valve to backwash. Prime the pump, and turn it on. Backwash the filter for at least two minutes or until the filter’s sight glass is running clear. This helps get out all of the sand dust and extra debris from the new sand.
Shut the pump off, set the multiport valve to rinse, and turn the pump back on. Rinse the filter for one minute.
When backwashing your pool filter, use this easy-to-roll up and store backwash hose.
10. Run the Filter
Shut the pump off, turn the valve to filter, and turn the pump back on. Now check the pressure gauge. This is your filter’s normal running pressure. Remember it or write it down somewhere handy.
Check the gauge when you do your normal pool maintenance. When the pressure is 10 psi above normal, backwash the filter. Using the pressure gauge as a backwash indicator prevents you from over-backwashing and removing the dirt and debris your sand filter needs to function properly.
Sand-sational Job!
Choosing which type of pool filter sand to use is the most complicated part of this process, and you can’t really make a wrong choice. It’s simply a matter of choosing the one that will work best for your pool, depending on factors such as whether you have hard water, or chloramines are an issue.
Once the new sand is in and the pump is up and running, all you need to do keep an eye on things so your filter will run at optimal efficiency until the next time you have to change the sand. With just that little bit of care, you can relax and swim with peace of mind for about another five years.
Happy Swimming!
4 Ways We Can Help With Your Pool
- Pool Care Cheat Sheets (Free): Easy-to-use downloadable guides to help you keep track of taking care of your pool this year.
- The Pool Care Handbook: An illustrated guide to DIY pool care, including water chemistry, maintenance, troubleshooting, and more.
- The Pool Care Video Course: You’ll get 30+ step-by-step videos and a downloadable guide with everything you need to know about pool maintenance.
- The Pool Care App: Enter your water test results. Get a custom treatment plan. Know exactly what chemicals to add to keep your pool clear.


