

The Complete Guide to Pool Water Testing

The most accurate way to test your pool water at home is using a liquid drop test kit. I recommend the Taylor K-2005 for most pool owners. But if you struggle with high chlorine or have trouble reading colors, then I recommend the Taylor K-2006C. And if you have a saltwater pool, you can get the Taylor K-2006-SALT version.
Out of all the pool maintenance tasks you’ll perform over the life of your pool, testing the water is the one thing you’ll do more than anything else. I’ll show you how to do it properly, what to avoid, and recommend the best pool water testing supplies on hand.
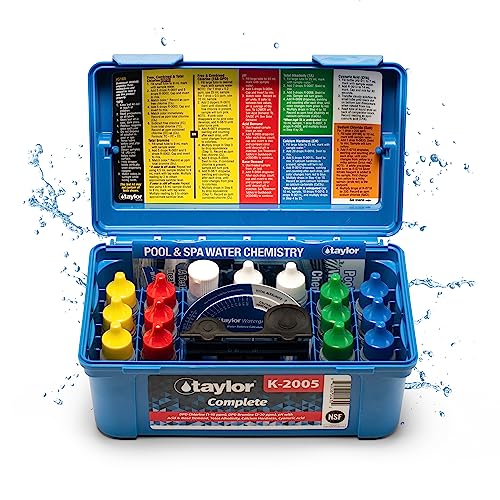
This complete water testing kit helps keep your pool or hot tub clean and safe to swim in, with easy-to-follow color instructions and all the supplies you need in one box.
Table of Contents
3 Ways to Test Pool Water Accurately at Home
You have a few testing options:
- Liquid test kit: This is the most accurate way to test at home, but it can be a bit time-consuming. Most professionals use liquid drops or a digital reader on the job. I recommend doing this at least once a week.
- Test strips: quick and easy, but less accurate. Great for a high-level overview of your pool water chemistry. I recommend using strips to do quick checks before and after heavy pool use and storms.
- Digital test kits and devices: quick, easy, but not cheap. This is overkill for more DIY pool owners. But I’m hoping they get cheaper over time. This is what professionals and pool stores commonly use.
No matter which option you choose, the most important step is to get a good water sample to test from.
How to Take a Proper Pool Water Sample
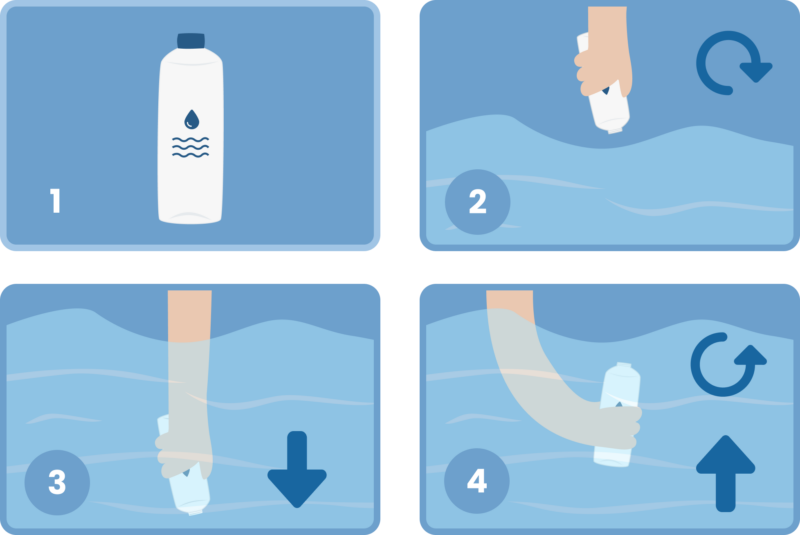
The most important factors here are where you take the sample from and how you do it. If possible, take the sample from the absolute middle of your pool.
- Use a clean cup or bottle (with a cap if you’re taking it to the pool store). I recommend using a proper water sample bottle used in labs.
- Hold it upside down so the opening is facing the pool floor.
- Find a spot in your pool that’s away from any skimmer opening or return jet. Ideally, you want your pump running for at least an hour before taking the sample.
- Insert the cup or bottle into the water elbow-deep, and then turn it right side up to collect the sample.
Important: Do not take the sample near the skimmer opening or any return jets.
How to Use a Liquid Drop Pool Water Test Kit
Here’s the fastest way to test your water right the first time.
- Check your reagents first. Look at the expiration date before you start. Old drops give bad readings, so replace them at the start of each swim season. They usually only last about one year.
- Collect your sample the right way. Take it from the middle of your pool, away from the skimmer and return jets. Hold a clean cup or water sample bottle upside down, dip it about elbow deep, roughly 18 inches (45 cm), then flip it right side up to fill it.
- Check your water temperature. Your sample should be between 50 and 90°F (10 and 32°C) for accurate results. Water that’s too hot or too cold can throw off your reagents. If your pool water is not in this temperature range, just allow the sample to come to room temperature in the bottle.
- Add your drops in order. Follow your kit’s instructions exactly, and add reagents in the order listed. The order matters.
- Mix based on the test type. For most tests, cap the tube and gently turn it upside down to mix. For drop-count tests, add one drop at a time, swirl after each drop, and count until the color changes.
- Read it against a white or natural background. Hold the tube at eye level in natural light, ideally against the sky or a white sheet of paper. Match the water color to the chart in your kit.
- Test at the same time each day. Morning is best, before the sun and swimmers change your levels. This makes it easier to spot changes over time.
- Avoid the common slip-ups. Don’t let the dropper tip touch the tube, since that cross-contaminates your reagents. And don’t test right after adding chemicals or during rain, because those readings won’t be accurate.
IMPORTANT: One thing a lot of people miss with the Taylor kit is how you hold the reagent bottle. For an accurate reading, it needs to be straight up and down, not tilted or sideways. Holding it vertical gives you a consistent drop size every time, and that’s what keeps your results reliable.
UPGRADE: You can buy a battery-powered magnetic stirrer. You drop a small magnetic stir bar in the sample tube, set it on the device, and it swirls the water for you while you add drops. Consistent, hands-free mixing gives you a cleaner color change.

Take the guesswork out of testing your pool or hot tub water with this magnetic stirrer that mixes samples fast and evenly, so you get clear, accurate results every time.
How to Use Pool Test Strips
Test strips are super quick and easy to use. Also, they’re less expensive than liquid kits. Use test strips for a quick gut-check on your pool’s chemistry.
- Collect a water sample.
- Dip a strip into the water, quickly in and out. No need to let it stay submerged or soak.
- Hold it still in the air for about 15 seconds. No shaking!
- Compare the strip to the guide on the packaging, and match up the colors on both.
- Adjust your chemicals accordingly.
The type of strips you’ll use most often are general ones that check for the primary components of ideal pool water: pH, alkalinity, and chlorine. I recommend going for 6 or 7-way test strips that check for free chlorine, total chlorine, pH, alkalinity, cyanuric acid, and calcium hardness.
You’ll also find specialty strips that test for things like metals (like copper and iron) and salt if you have a saltwater pool. More on testing these later.
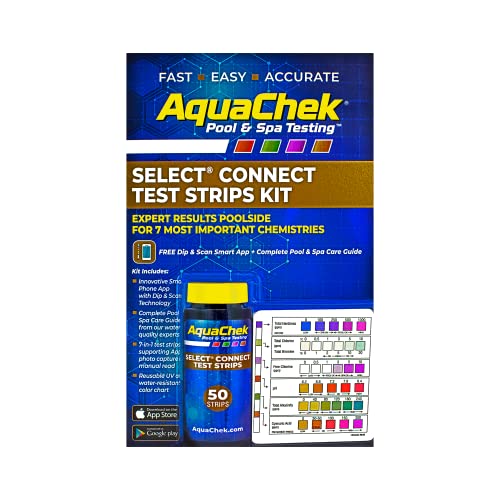
Tests for 7 important chemistries in seconds: Total Hardness, Total Chlorine, Total Bromine, Free Chlorine, pH, Total Alkalinity, and Cyanuric Acid.
How to Use a Digital Pool Water Test Kit or Device
This is like a super-powered liquid test kit. You still add liquid reagents and tablets to water samples, but instead of having to eyeball color scales, the digital reader does the hard work for you.
Digital test kits also check for just about everything, including free chlorine, total chlorine, bromine, pH, alkalinity, calcium hardness, and cyanuric acid. It’s a pool water testing powerhouse in the palm of your hand.
- Blank the meter first. Fill a clean tube to the 5 mL line (about 0.17 fl oz) with your water sample and cap it with the blue cap. Insert it, turn the meter on, and press the button to “Blank” it. This sets your baseline before any test.
- Test free chlorine. Add 5 drops of DPD 1A and 5 drops of DPD 1B to that same tube. Cap it, invert it 3 times to mix, then insert it and read “FCL.”
- Test total chlorine. Take the cap off that same chlorine tube and add 5 drops of DPD 3. Swap to the pink cap, invert 3 times, insert, and read “TCL.”
- Test pH. Fill a clean tube to the 5 mL line, add 5 drops of pH reagent, and use the red cap. Invert 3 times, insert, and read pH.
- Test total alkalinity. Fill a clean tube to the 5 mL line, drop in 1 ALK 2X IG tablet, and crush it with the crusher. Use the green cap, invert 10 times, insert, and read “Alk.”
- Test calcium hardness. Fill a clean tube to the 5 mL line, add 1 CA HARD 2X IG tablet, and crush it. Use the purple cap, invert 3 times, insert, and read “Ca Hard.”
- Test cyanuric acid. Fill the CYA tube to the line, add 1 CYANURIC ACID tablet, and crush it thoroughly. Use the grey cap, invert 3 times, then let it sit for 2 minutes. Don’t mix again, just insert and read “CYA.”
- Rinse and dry when you’re done. Brush and rinse your tubes, caps, and crusher after testing, then let everything dry before packing it up. Dry tubes and matching color caps keep your next readings accurate.

This digital pool and hot tub water test kit checks for Free Chlorine, Total Chlorine, Bromine, PH, Alkalinity, Calcium Hardness, and Cyanuric Acid.
Test Strips vs. Liquid Kit vs. Digital Readers
Test Strips are the cheapest and easiest way to test your water. You just dip and compare the colors to a chart. The tradeoff is they measure fewer things and can be thrown off if they get damp or are left unsealed.
Liquid Test Kits give you a broader range of tests and more accurate results. You add reagent drops to a water sample and watch the color change. The catch is they take more care, since adding too many or too few drops can skew your reading.
Digital Readers are fast, accurate, and great if you have trouble reading colors. You get a clear number instead of a color match. The downside is they cost more than strips or a liquid kit.
For most pool owners, I recommend test strips for quick weekly checks and a liquid kit or digital reader when you want a more accurate reading, or you’re chasing down a water problem.
Should you Trust Professional Water Testing At The Pool Store?
If you decide to take a water sample to your local pool store for testing, collect the sample the same way you would if you were testing at home. You may be able to have water tested on a walk-in basis, but it never hurts to call ahead.
I always recommend buying supplies at your local pool store. I like supporting my local businesses.
But keep in mind that some pool stores use water testing software created by the chemical companies. And if you don’t get a knowledgeable employee, you’re at risk of buying chemicals you don’t need.
How Often (and When) Should You Test Your Pool Water?
I recommend testing your pool water at least once a week using a liquid drop test kit. Testing at the same time each day gives you more consistent results. Mornings are my go-to. Run your pump overnight during off-peak hours, and the water gets a full night to circulate before you test.
You’ll want to test it more often if the pool is getting a lot of use or if it’s rained, and every time you add chemicals. For quick checks like this, I recommend using test strips. You may also need to test more often if you have problems with your pool water.
Take a sample to a pool store once a month for a pro check (only if they use a digital liquid testing system), and when opening and closing your pool. Just remember to take their chemical recommendations with a grain of salt. The testing software they use is often created by the chemical companies that make their money selling you more chemicals.
If you want, you can enter your test results into our Pool Care App. We offer you money-saving chemical options that you can customize for your specific pool and budget needs. There’s a 7-day free trial, so you can try it out to see if it’s a good fit for you.
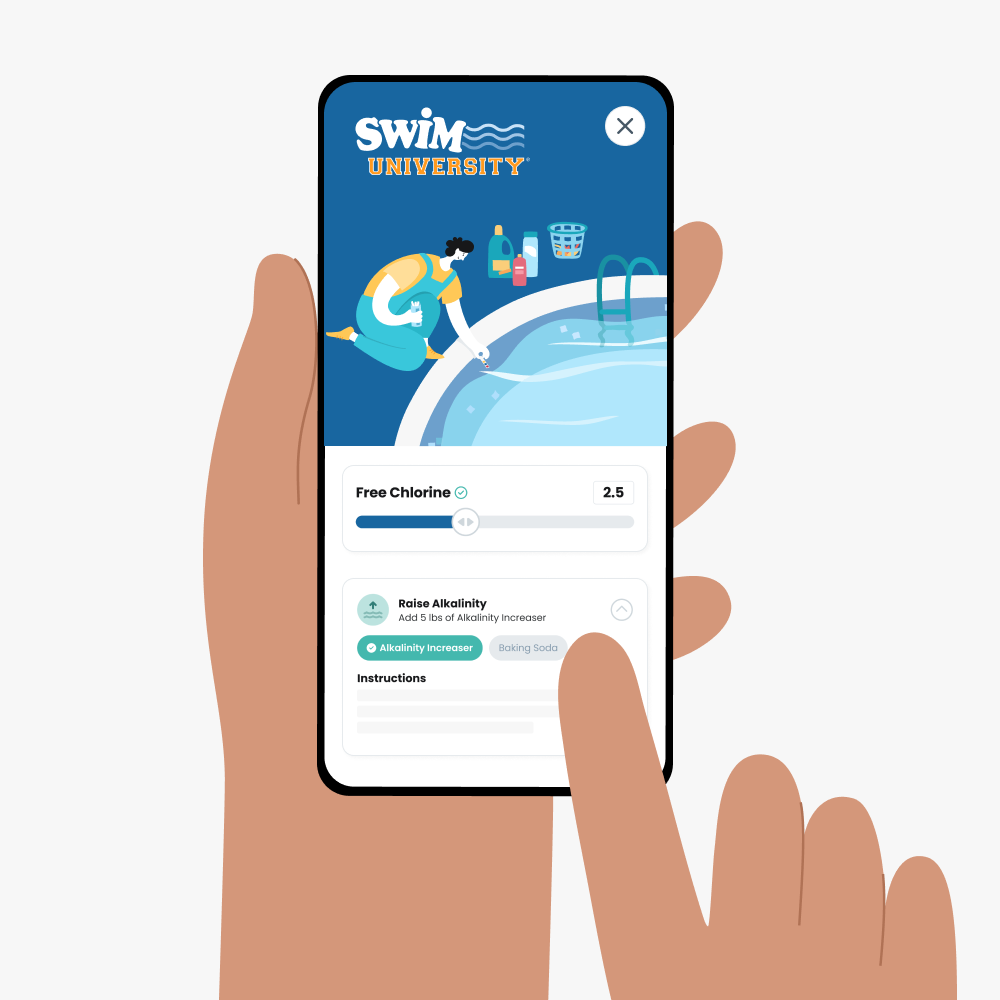
Enter your water test results. Get a custom treatment plan. Know exactly what chemicals to add to keep your pool clear. Saltwater and hot tub compatible.
What Pool Testing Products I Would Avoid
I would avoid the cheap OTO kits because they only test total chlorine and pH. I also suggest avoiding a digital water chemistry monitor. These use fragile probes to constantly measure limited things like pH and ORP. ORP stands for Oxidation-Reduction Potential and measures how effective your chlorine is.
I’ve been in this industry a long time. And I’ve seen products like these come and go. All of these products I’ve tried over the years were expensive, didn’t test for everything you need, constantly monitored your water (which constantly pinged your phone), and some required a monthly subscription. Hard pass!
There are a few new ones out there, like Water Guru. Admittedly, I haven’t tested this product. But I understand the technology. And I just don’t recommend these products. So you can avoid them. Your bank account will thank you.
What is ORP and Should You Test Your Pool For It?
Most pool owners don’t need to test it. It stands for oxidation-reduction potential, and it measures your chlorine strength in millivolts (mV). It’s not a direct chlorine reading telling you that you have exactly 3 ppm of free chlorine.
Testing Your Pool Water for Metals (Iron and Copper)
You only have to check your pool water for metals if one or more of the following is true:
- You fill your pool using well water.
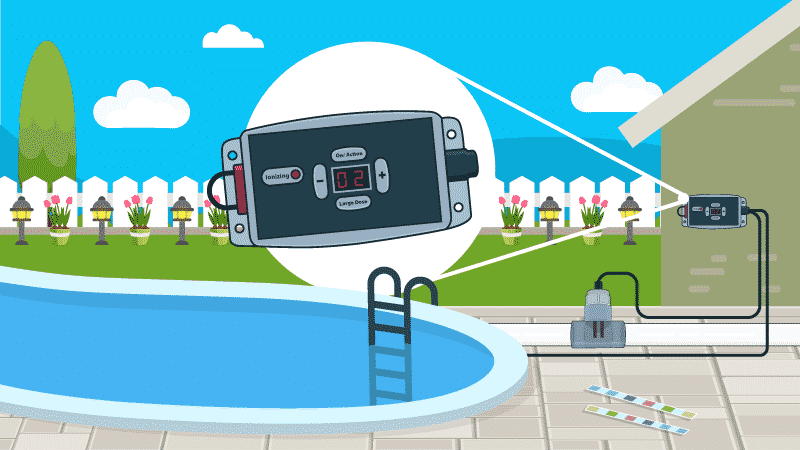
- You use a Ionizer as a supplement sanitizer.
- You consistently use a copper-based algaecide or Pool Rx.
- You have a pool heater.
First, the tap water you use to fill your pool may contain trace amounts of copper or iron. As water evaporates from your pool, it leaves the metals behind. To counter evaporation, you’ll add more water, which means you add more copper, and then more water evaporates, and that leaves more copper in your pool.
Second, low pH levels can cause copper elements in your pool heater or plumbing parts to corrode. The corrosion will then make its way into your pool water. The longer the corrosion is left unaddressed, the more copper buildup you’ll have in your water.
Most test strips don’t test for heavy metals. You’ll need a special set in addition to the ones you use for chlorine, pH, and other levels. While it’s ideal to conduct pool water testing for chlorine and pH levels weekly, it’s sufficient to test for copper once at the beginning of the pool season.

This water testing kit offers a convenient way to monitor water quality without the need for reagents. It tests for iron and copper with a range of 0 to 5 ppm and 0 to 3 ppm.
Testing Your Pool Salt Levels
If you’re lucky enough to have a saltwater pool, or you’re thinking about converting, you’ll need to test for salt levels as part of your regular pool maintenance schedule.
The salt in your water runs through a saltwater chlorine generator (SWG) to convert the salt into chlorine. And if there’s not enough salt in the water, you won’t generate enough chlorine. Technically, it converts to hypochlorous acid (HOCl), which is what chlorine converts to when it enters your water.
To keep your chlorinator running well and your chlorine at optimal levels, you want to shoot for a salt level of between 2,600 and 3,200 ppm. Check your saltwater generator instructions for the exact recommendation because each of them requires a different amount of salt in the water.
Also, most saltwater generators measure the salt in the water, so you won’t need to test this separately. But if you want, you can use the Taylor K-2006-Salt liquid kit, specialty salt test strips, or a digital salinity meter (which is what I recommend).
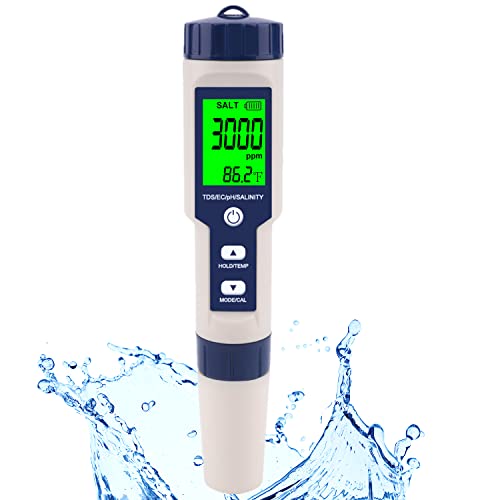
This Digital Salinity Tester is an accurate, easy way to verify the salt levels in your pool. Simply place the tester in your pool water for a digital salinity reading.
Because it’s not as delicate to keep balanced as other chemicals and substances in your pool, salt can be tested just once a season.
However, you may want to test salt levels after certain events, such as a rainstorm, adding fresh water to your pool, or after you’ve had a lot of guests swimming and splashing around in the pool.
Key Takeaways
- The most accurate way to test your pool at home is with a liquid drop test kit. Use it at least once a week, and keep test strips on hand for quick checks before and after storms or heavy pool use.
- Always take your sample from the middle of the pool, elbow deep, and away from the skimmer and return jets. Run your pump for at least an hour first so the water is well mixed.
- Reagents go bad, so check the expiration date before you test and replace your drops at the start of each swim season. Old drops give you bad readings.
- Test your sample when it’s between 50 and 90°F (10 and 32°C). Water that’s too hot or too cold can throw off your reagents, so let the sample warm up or cool down to room temperature first.
- Test your metals (copper and iron) with special strips once at the start of the season, since regular strips don’t check for them.
- For a saltwater pool, aim for a salt level between 2,600 and 3,200 ppm, but always check your generator’s instructions since each one calls for a different amount. Most generators read salt for you, so you usually don’t need to test it separately.