A Beginner’s Guide to Pool Maintenance

Pool maintenance comes down to three things: circulation, cleaning, and chemistry. Keep your water moving through the filter, keep your surfaces clean, keep your water balanced, and your pool will stay clean and clear all season.
This is the 3-part system I’ve developed over the last 30 years. It’s helped millions of pool owners keep their pools clear without overspending on chemicals they don’t need. It works for every type of pool, including inground, above ground, inflatable, and quick-set pools. And it works with every sanitizer system, including chlorine, salt water, minerals, UV, and ozone.
At the end, I’ll give you a complete pool maintenance schedule, so you’ll know exactly what to do and when. Watch the video below for the full walkthrough, or keep reading for the complete guide.
An illustrated, step-by-step guide to taking care of your pool yourself. Works for chlorine and saltwater pools.
Your pool profile
Before we get into how to take care of your pool, you need to know a few things about your specific setup. This stuff matters. The wrong chemical dose or the wrong cleaning approach can cause real damage. So let’s walk through it.
1. What are the walls and floor made of?
Is it vinyl, plaster, concrete, or fiberglass? The material affects both your water chemistry and how you clean the surfaces.
Here’s a simple way to figure it out: just reach in and feel it.
- Plastic with visible seams and patterns: that’s a vinyl liner.
- Smooth and hard with no seams: fiberglass.
- Rough like rock or cement: plaster, pebble, or quartz.
- Smooth but leaves a chalky residue on your hand: that’s painted concrete.
2. How many gallons does your pool hold?
You’ll need this number to calculate how much chemical to add and how long to run your pump. If you’re not sure, use our pool volume calculator.
3. What kind of pump or pumps do you have?
Your pump pulls water out of the pool and through your filtration system. You’ll want to know the make and model, and whether it’s a single-speed, dual-speed, or variable-speed pump. This affects how long you run it each day.
Look for a label on the pump housing. If it’s missing or worn off, check for part numbers on the lid or basket.
Some pools have a second pump, usually dedicated to an automatic pool cleaner, fountain, or waterfall. If you do have one, make a note of what it does and its make and model. You’ll want to know when it should be running and when it shouldn’t.
4. What kind of filter do you have?
There are three types: sand, cartridge, and DE (which stands for diatomaceous earth).
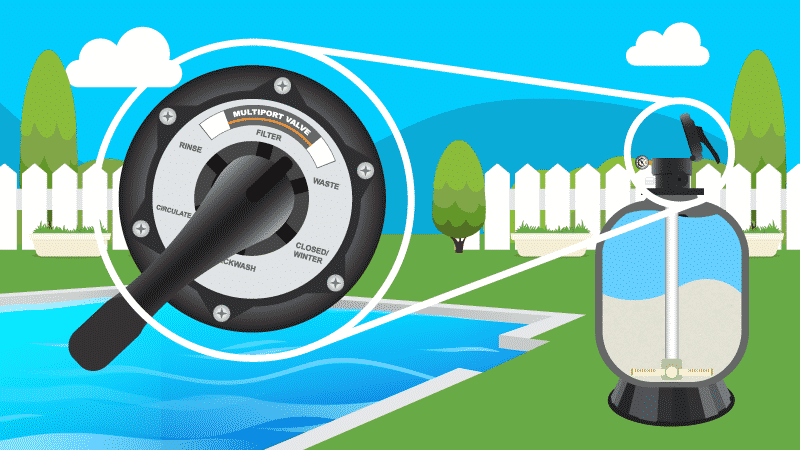
A sand filter is the easiest to spot. It’s got a big round tank, almost like a pot belly, and it’s heavy even when new. It also has a multiport valve on top or off to the side with settings like Filter, Backwash, Waste, and Rinse.
Cartridge and DE filters look similar from the outside, so you may need to open them up. Inside a cartridge filter, you’ll see one or more cylindrical cartridges, like an air filter. A DE filter has a grid or finger system coated in white powder.
In terms of ease of use, sand is the easiest, cartridge is in the middle, and DE is the most involved, though it filters the best. If you’re shopping for a new filter, a cartridge filter is a solid all-around choice.
5. What else is treating your water?
After water passes through your filter, it might run through additional equipment before returning to the pool, like a chlorinator, salt system, ozonator, UV system, mineral system, or heater. What you have here directly affects how much chemistry you need to add manually. Look for any equipment connected to the plumbing between your filter and your return jets.
These are what make up your basic pool profile. Write them down somewhere, since you’ll need them for maintenance and troubleshooting. If you have an inground pool, you’ll also need to know where all your plumbing goes to and from. We have a full guide on how to map out your pipes and pool valves if you need more help with that.
Now that we understand the basic pieces of your pool, it’s time to take care of it with the three C’s of pool care: circulation, cleaning, and chemistry.
Circulation
Let’s start with circulation. Good circulation is like having a strong, healthy heart. Water needs to move out of your pool, through your filtration system, and back in again, continuously. If anything slows that flow down, you end up with stagnant water, and stagnant water means cloudy water and algae. Once you get circulation dialed in, the goal is just to maintain it.
Here’s each part of your pool that impacts your circulation, from your skimmers all the way to your return jets, and how to make sure each one is doing its job.
1. Skimmers
Skimmers are the rectangular openings where water exits the pool and enters your filtration system. If you have an above-ground pool, you have one. Inground pools usually have more than one.
Each skimmer has a basket inside. That basket catches large debris before it reaches your pump. Check and empty those baskets once a week. After a big windstorm, check them sooner.
If you’re dealing with fine debris like pollen or dust, drop a skimmer sock in there. It’ll catch the tiny stuff your basket can’t. Just check it every other day so it doesn’t restrict flow.
Also, make sure your water level is at least halfway up the skimmer opening. If it drops below that, your pump starts sucking in air. And that kills your circulation.
2. Main drains
If you have an inground pool, you also have a main drain at the bottom. Some pools have two. That’s intentional. Two drains spread out the suction so it’s not dangerously strong in one spot. It’s a safety feature.
Water should always be flowing through your main drains. If something seems off, make sure there’s no debris blocking them.
3. Suction side lines
These plumbing lines carry water from your skimmers and main drains to your pump. All the valves along those lines need to be fully open, so water flows freely. Check out our guide to pool valves if you’re not sure what each valve does. If you suspect a clog, start by checking your skimmer basket, because that’s the most common cause.
4. The pump
The pump pulls water from the pool and pushes it through your filter. Every pump has a clear lid so you can see inside.
Inside the pump housing, there’s a pump basket. It catches anything that made it past your skimmer. Check it once a week when you check your skimmer baskets. You can usually see through the lid without opening it.
While you’re looking in there, watch for air bubbles. Air trapped in the system causes weak flow and can eventually overheat and damage your pump motor.
Troubleshooting the pump water flow
Check the pump lid O-ring for cracks or dryness. A bad seal lets air in. Keep it lubed with silicone-based lubricant (not petroleum jelly), and replace it if it’s worn.
Also, check the unions and connection points between the pump and your plumbing. Loose connections are another air entry point. Add plumber’s tape to anything that feels loose.
If your pump is struggling with flow after backwashing or opening the pool for the season, it probably needs to be primed. Turn it off, remove the lid, and fill the housing with a garden hose for a couple of minutes. Replace the lid, turn the pump back on, and watch the housing fill with water. It might sputter. That’s normal. Give it a couple of tries if it doesn’t catch.
How long should you run your pump?
Your pump needs to pull all the water in your pool through the filter at least once a day. That’s called your turnover rate. A typical run time is 8 to 10 hours per day.
In hot weather, run it longer. Heat speeds up algae growth and burns through chlorine faster.
If you have a variable-speed pump, run it longer but at lower speeds (at least 12 hours a day is typical). Split it up: a few hours on high speed for chemical circulation and skimming, then the rest on low speed for basic filtration. The low speed draws so little electricity that it’s often more efficient to just let it run around the clock. Just make sure it’s running fast enough to trigger your salt water generator or heater’s flow sensors.
Timing matters too. Run your pump when the sun is strongest. That’s when algae grows fastest, and UV rays hit your chlorine hardest. If you can, avoid running it during peak electricity hours in the early evening to save on your bill.
If you notice cloudy water, weak return jets, algae starting to appear, or chemical levels that won’t hold, those are all signs you’re not running your pump long enough. Try adding 2 to 4 more hours and see if it clears up.
5. The filter
Clean water leaves your pump and heads into your filter. The filter’s job is to catch everything the pump pulls in. But as it does its job, it gets dirty. And a dirty filter means restricted flow and poor circulation.
When do you clean your filter?
Every filter has a pressure gauge. When your filter is freshly cleaned and everything is running normally, check that gauge and write down the number. That’s your baseline pressure.
As the filter collects debris, the pressure inside the tank rises. When the pressure climbs 8 to 10 PSI above your baseline, it’s time to clean your filter. If your baseline is 10 PSI, clean it when it hits 20 PSI.
If your gauge reads zero, it’s probably broken. Replace it. It’s cheap and easy to swap out, and you’re flying blind without a working one.
Another sign it’s time to clean your filter: the water flow out of your return jets is weak, or you’ve got persistently cloudy water.
You’ll also want to clean your filter if you’re trying to clear up algae with shock and you’re running it 24/7. We’ll cover shock in the chemistry section.
Sand filter cleaning
Sand filters are cleaned by backwashing. This means you’re reversing the flow of water inside the filter to dislodge contaminants in the sand. The dirty water will exit the filter through the waste port.
To backwash, turn off the pump. Turn the multiport valve to the Backwash position. Attach a backwash hose to the waste port so dirty water drains away from the pool. Turn the pump back on.
Watch the sight glass on the valve, that small glass window. It’ll run cloudy at first. Once it runs clear, shut off the pump.
Then turn the valve to Rinse and run the pump for about a minute to reset the sand bed. Then turn the pump off, switch back to Filter, and turn the pump on. Done.
Once a year, you can add a sand cleaner to your filter to get the sand extra clean. Then plan to replace the sand entirely every 3 to 5 years. For an in-depth walkthrough, check out our guide to backwashing.
Cartridge filter cleaning
Cartridge filters require more hands-on cleaning. Turn off the pump and close the ball valve between your pool and your pump. Bleed the air pressure from the tank using the air bleeder valve. Then unclamp the filter lid, pull out the cartridges, and hose them down with a spray nozzle on your hose.
Spray into the pleats until they go from dirty gray to white. Reassemble everything. Replace the filter top and close the clamps. Reopen the valves between the pool and pump, turn the system back on, and open the air relief valve to release any excess air in the system. Keep the valve open until a steady stream of water sprays out.
For deeper cleaning, spray with filter cleaner, let it soak for 15 to 20 minutes, and then rinse it off. And if your cartridge is damaged, ripped, torn, or just too dirty to salvage, it’s time to replace it. Cartridges should last 3 to 5 years, but if your pool has heavy use or they’re tiny or cheap cartridges, you may need to replace them once a year.
DE filter cleaning
It’s the most powerful filter you can put on a pool, but it takes more upkeep than sand or cartridge. There are two things you need to do: backwash it monthly or when the PSI is 10 above your normal pressure, and deep clean it once or twice a season.
How to backwash a DE filter
- Turn off the pump. Connect your backwash hose to the waste port. Set your multiport valve to Backwash, or pull up the plunger if you have a push-pull valve.
- Turn the pump on. Run it for 1 to 2 minutes or until the water coming out of the hose runs clear. Turn off your system again.
- If you have a multiport valve, set the valve to Rinse and run the pump for 30 seconds to settle the grids. Skip this step if you have a push-pull valve.
- Recharge it with fresh DE. Mix your DE powder with pool water in a bucket until it’s the consistency of gravy. The amount depends on your filter size, so check the square footage on your filter tank or manual. For a deep clean, add 1 lb per 10 sq ft. After a backwash, you only need 80% of that, since you didn’t flush all the DE out. Always wear a mask when handling DE powder.
- With the pump running and the filter on the Filter setting, remove the skimmer basket and pour the slurry into the skimmer. Run the system for at least 30 minutes.
How to deep clean a DE filter
Once or twice a season, fully disassemble the filter. Turn off the pump, open the air release valve, and remove the drain plug to drain the tank. Pull off the clamp, remove the lid, and take out the manifold and grids one at a time.
Spray everything down with a garden hose. Don’t use a pressure washer. If grids are stiff, soak them in DE filter cleaner. Once a year, soak the manifold overnight in a 1:20 muriatic acid-to-water solution (wear goggles, gloves, and a mask).
Wipe down and lubricate all O-rings with silicone-based lubricant, not petroleum jelly. Reassemble, replace the drain plug, turn on the pump, and close the air release valve once water sprays out. Add a full dose of fresh DE through the skimmer.
6. The return jets
Proper return jet positioning helps mix chemicals evenly and prevents dead zones where algae can grow.
Return jets are where filtered water comes back into your pool. Most jets have an eyeball fitting, a small adjustable nozzle. If yours don’t, add them. They’re cheap and make a real difference.
Aim the eyeball fittings down at about 45 degrees. Make sure all your return jets point in the same direction, either clockwise or counterclockwise, like you’re trying to create a circular flow pattern in the water. You won’t actually see it spin, but this keeps water moving continuously toward your skimmer and drains rather than sitting dead in the corners.
If your return jets feel stiff and won’t rotate easily, try using a hammer to lightly tap on the edge of the eyeball fitting. You can also stick a medium-sized screwdriver inside the eyeball and gently twist to loosen it up.
That’s pool circulation in a nutshell
Skimmers flowing, pump running, filter clean, jets pointed right. Get these things working together, and your pool will do a lot of the filtering on its own.
Cleaning
Now let’s talk about the second C in the three C’s of pool care: cleaning. There are three things we do to clean a pool. We skim the surface, we brush the floors and walls, and we vacuum. Simple as that.
Cleaning equipment
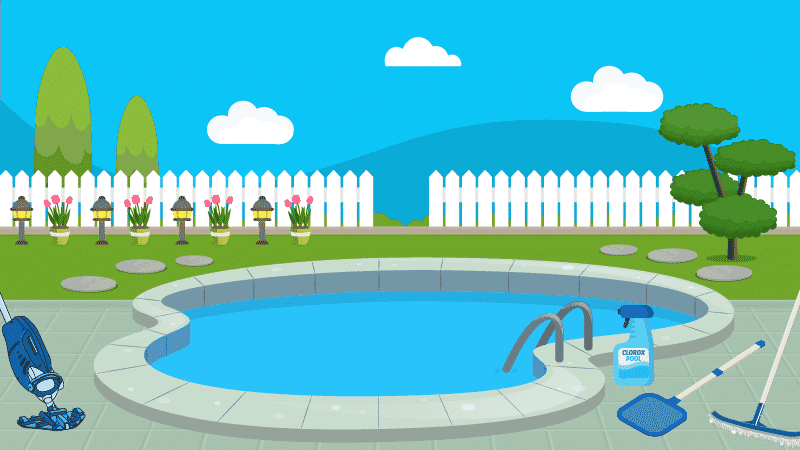
Before we get into it, here’s what you’ll need on hand:
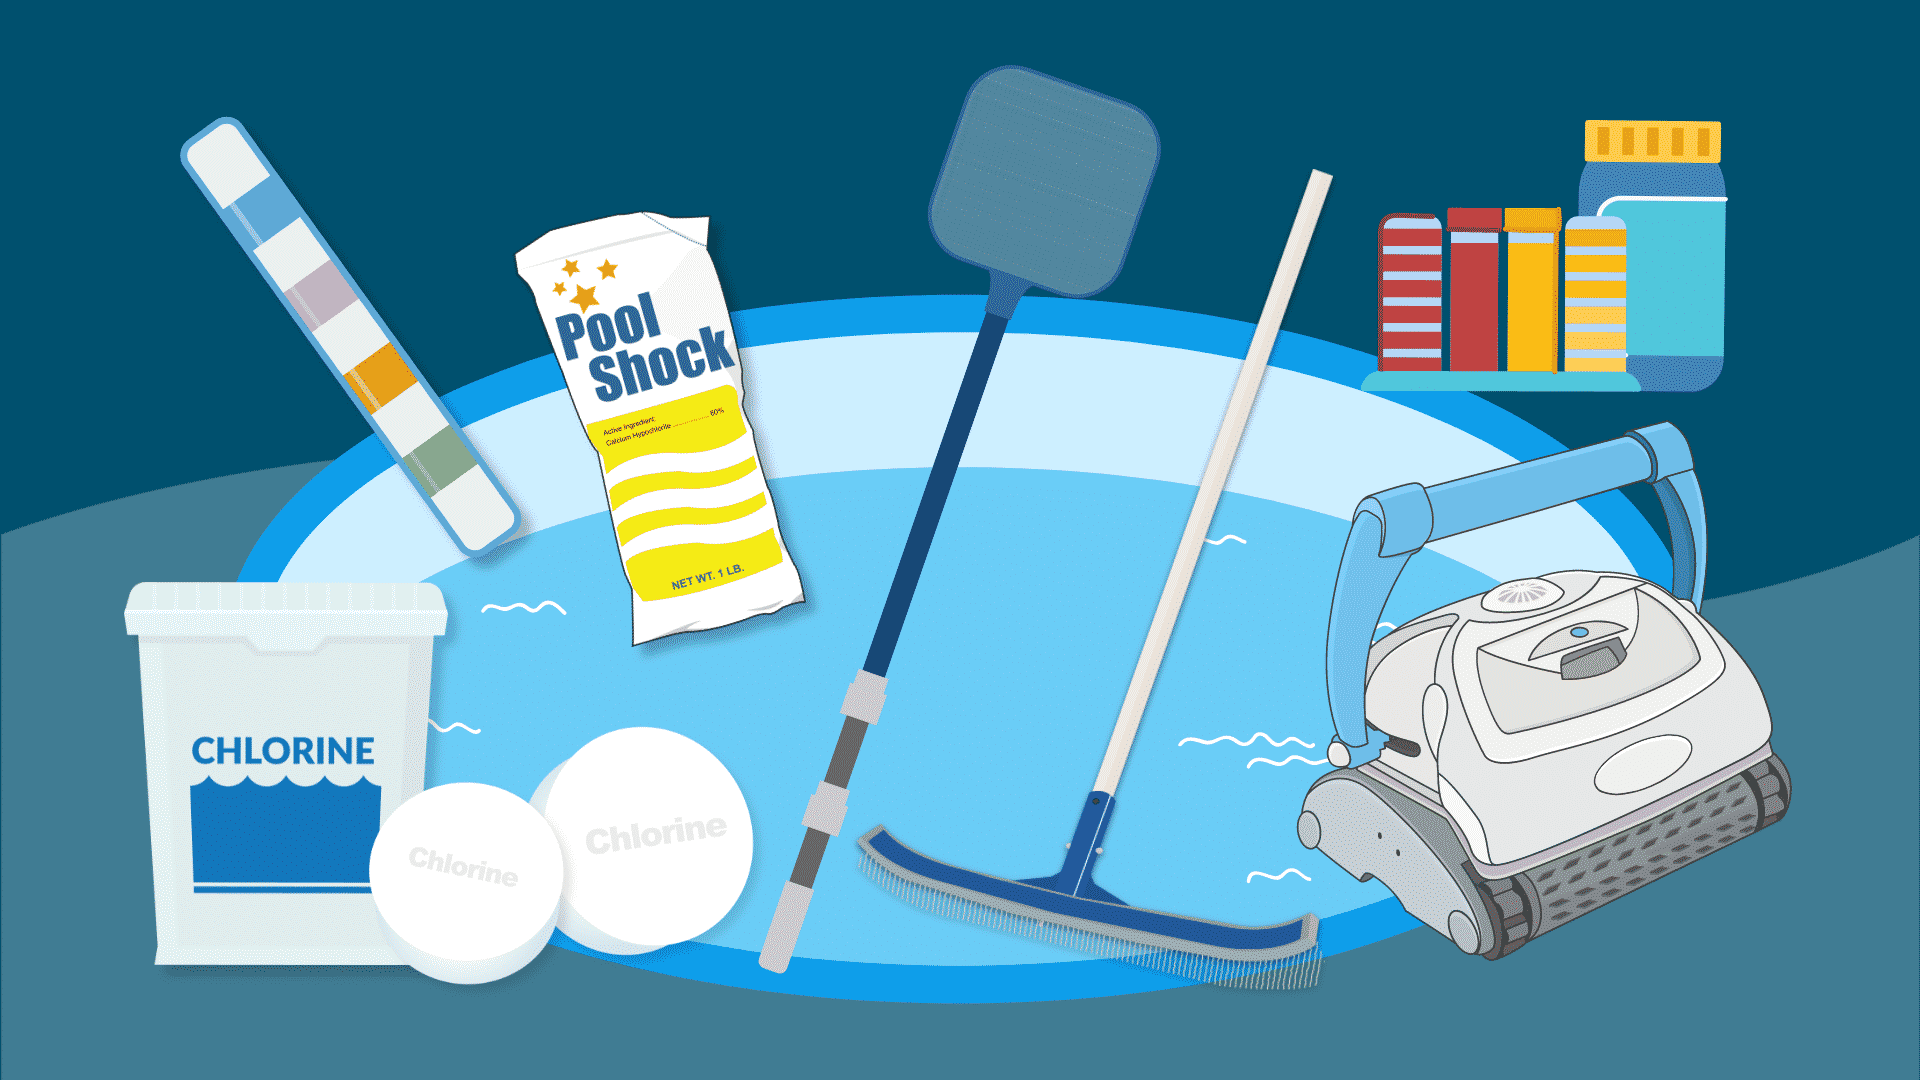
- Telescopic pole: Look for one that extends from 8 to 16 feet. It’s the same pole you’ll use for your net, brush, and vacuum head.
- Skimmer net and leaf net: A flat net works for quick surface skims, and a leaf net holds more for bigger cleanup days. We recommend having both.
- Pool brush: Look for nylon bristles for fiberglass, vinyl, or painted concrete pools. Get one with stainless steel bristles for unpainted concrete or gunite.
- Vacuum head, hose, and plate: A manual vacuum setup like this connects to your skimmer and uses your pump’s suction to vacuum the pool floor.
- Automatic or robotic pool cleaner: This is optional, but it’s great for weekly maintenance. You’ll still need a manual vacuum for algae and flocculant.
1. Skimming
Skimming, or netting, is when you take a net and sweep the surface of the pool to collect debris, pollen, leaves, twigs, and bugs. Do it as often as you can. Every other day is the goal, but once a week is the bare minimum.
If you keep the surface clean, debris won’t sink to the bottom, where it’s much harder to remove. And you’re giving your filter less work to do. Think of it as a quick, meditative ritual. Grab a cold drink, put on a podcast, and just skim.
As you skim, use the “cast and reel” technique. Flip the net over, cast it away from you, and pull debris toward you as you walk around the pool.
If you want extra help skimming away debris, there are two types of automatic skimmers worth knowing about: mounted skimmers, which run off your pump’s return pressure, and robotic skimmers, which run on batteries or solar and don’t need your pump running. Neither replaces hand-skimming, but they help keep things tidy in between.
2. Brushing
Even if you skim every day, stuff is still going to cling to your walls and settle into crevices, especially in concrete or gunite pools. Brush once a week at a minimum.
Brush every surface: floor, walls, behind ladders, corners, and stairs. And make sure to get all of the crevices. These low-flow “dead zones” are where algae spores love to hide. Brushing loosens contaminants off your surfaces and into the water, where your chlorine can kill them and your filter can capture them.
If you’ve already got a full-blown algae problem, brushing alone won’t fix it. But it’s always the first step to getting algae spores off the wall.
3. Vacuuming
Vacuuming removes the dirt and smaller debris that settle to the bottom: the stuff skimming and brushing stir up but don’t fully eliminate, or what your filter can’t pick up. Plan to vacuum once a week.
You’ve got two options for vacuuming: a manual vacuum or an automatic pool cleaner. I recommend investing in an automatic cleaner. It’s the best hands-free upgrade you can make. Use a robotic cleaner for regular weekly maintenance. But you’ll still need a manual vacuum to remove algae or flocculant.
When it comes to manually vacuuming, there are two filter settings that are important to know about: Filter and Waste.
For regular manual vacuuming, use the Filter setting. This means that as you vacuum, water passes through your filter as normal. But if you’re vacuuming up algae, cloudy water, or flocculant, switch to Waste so that dirty water bypasses the filter and exits through your backwash hose. If you have a cartridge filter with no Waste setting, remove the cartridge and open the drain at the bottom of the filter housing. Water will exit there instead as you vacuum.
I also recommend using a vacuum plate (also called a skim vac) when connecting your vacuum hose to the skimmer. Without it, debris bypasses the basket and goes straight to your pump, which can clog or damage it.
If you’re not sure how to set up your manual vacuum, check out our guide to vacuuming a pool.
When it comes to automatic cleaners, there are three types. Robotic cleaners are my favorite. They plug into an outlet, run independently of your filter, and scrub your surfaces as they go. Pressure-side cleaners connect to your return line and use water pressure to power the vacuum. Suction-side cleaners attach to your skimmer and use your filter system to create suction, though there’s a risk of debris getting pulled into the filter. I say stick to robotic cleaners.
4. Additional cleaning
Beyond the weekly three, here’s a quick rundown of what else needs cleaning and how often:
- Pool deck: Clean it monthly by sweeping and pressure-washing. For slippery or slimy buildup, use a pool deck cleaner or trisodium phosphate (TSP).
- Pool accessories: Clean these monthly. Wipe down ladders, railings, and slides with a soft towel and diluted white vinegar or pool surface spray.
- Filter: Clean it when pressure is high or flow is weak. See the circulation section above for a full walkthrough.
- Heater: Inspect it monthly for corrosion and clean it at the start and end of the season.
- Salt cell: Inspect it every three months if you have a salt water system, and clean off any calcium buildup. Check out our salt water pool maintenance guide for more on that.
That’s cleaning. Skim every other day, brush once a week, vacuum once a week, and do a deeper equipment clean every month. Stay consistent, and your filter and chemicals won’t have to work nearly as hard.
Chemistry
So that’s circulation and cleaning. Now let’s talk about the third C, and the one most pool owners stress out about the most: chemistry.
It’s not as complicated as it looks. Once you understand the types of chemicals you’re working with and what each one actually does, it all starts to make sense.
What does balancing your water look like each week?
At a minimum, you’re testing your water once a week and adjusting whatever is out of range. Three levels fluctuate the most and need the most attention: alkalinity, pH, and chlorine. These make your water sanitary and comfortable to swim in. Keep those three in check, and you’re in good shape most of the time.
The other levels, like cyanuric acid and calcium hardness, don’t need weekly attention, but you should check them at least once a month or whenever you add fresh water.
Everything in pool chemistry is connected. One level affects another. So there’s a specific order you balance them in, and we’ll walk through that as we go through each group of chemicals.
Testing your water
Testing is how you know what to adjust, how much to add, and whether anything you did actually worked.
Plan to test your water at least once a week. Test more often if the pool is getting heavy use, you’ve had a lot of rain, or you’re dealing with a water issue. When in doubt, test.
Your testing options
Test strips are the fastest and most affordable option. For weekly maintenance, they get the job done and give you a high-level snapshot of your water chemistry. They won’t give you lab-level precision, but they’ll tell you if something is off and needs attention. Collect a sample of water from your pool, dip the test strip into the sample, wait 15 seconds, and compare the colors to the chart on the bottle.
Liquid drop test kits are more precise. You collect a water sample, add a few drops of reagent, and read the color change against a chart. They take a little more effort, but if you’re troubleshooting a problem or want more accurate numbers, they’re worth having on hand. This is the type I recommend.
Digital readers are the most accurate option and great if you have trouble reading colors. They’re more expensive, but they remove all the guesswork from color-matching.
Pool store testing can be useful when you open the pool, or if you’re dealing with a problem you can’t diagnose on your own. They can test for things like total dissolved solids and metals that home kits often miss. I used to do these for a living in the pool store. But I always tell people to test on their own first.
How to collect a good water sample
This matters more than people think. Find a spot at the edge of your pool away from the skimmer and return jets. Hold your cup or container upside down, insert it elbow-deep, then flip it right side up to collect the sample. This gives you the most representative read of your actual water, not a localized concentration near your equipment.
What you’re testing for
A standard 7-way test strip will cover the essentials: free chlorine, total chlorine, pH, total alkalinity, calcium hardness, and cyanuric acid. Your free and total chlorine should be as close to each other as possible. The gap between them is your combined chlorine, or the chlorine that’s been used up in the water. We’ll talk about that in the shock section.
Remember that not every level needs to be adjusted weekly. Focus on alkalinity, pH, and chlorine every week. Check CYA and calcium hardness monthly, or when you suspect something’s off.
The types of chemicals and what they do
Think of your pool chemicals in four groups: balancers, sanitizers, shock, and protectors. Then there’s a fifth group, enhancers, for when you need a little extra help.
Group 1: Balancers
Balancers prep your water so everything else can work. If your water isn’t balanced, your sanitizer won’t work as well, your equipment can corrode, and your swimmers will feel it: burning eyes and itchy skin. Balanced water is the foundation.
The two balancing chemistry levels are pH and total alkalinity.
pH measures how acidic or basic your water is on a scale of 0 to 14. You want to keep it between 7.4 and 7.6. Below that, the water gets acidic, which is corrosive to your equipment and irritating to swimmers. Above that, your water becomes basic, your chlorine stops working as well, and you can get scale buildup.
The problem with pH is that everything affects it: rain, swimmers, and even your other chemicals. It’s volatile. That’s where total alkalinity comes in.
Total alkalinity helps keep your pH stable, so it doesn’t fluctuate with every little thing you add to your water. Your target range is 80 to 120 PPM. When alkalinity is in range, your pH stays stable. When it’s low, your pH becomes unpredictable. This is why we always adjust alkalinity first, then pH.
To adjust your pH and total alkalinity, you’ve got these options:
- Alkalinity increaser or baking soda. Both have the same active ingredient (sodium bicarbonate). This will raise your alkalinity and slightly raise your pH.
- pH increaser or soda ash. The active ingredient in both is sodium carbonate. This raises pH without affecting alkalinity as much.
- Aeration also raises pH without impacting alkalinity.
- pH decreaser or dry acid lowers both pH and alkalinity.
- Muriatic acid also lowers both. Dry acid is safer to handle, but lots of people prefer muriatic acid or already have it on hand for cleaning concrete.
Group 2: Sanitizers
Your sanitizer is what actually kills the bacteria, algae, and everything else swimmers don’t want to think about. This is non-negotiable. You have to have one.
The most common sanitizer is chlorine, and it comes in three forms: tablets (trichlor chlorine), granules (dichlor chlorine), and liquid chlorine (sodium hypochlorite).
Chlorine tablets are the most convenient option. You load them into an automatic chlorinator or a floating dispenser, and they dissolve slowly over time, releasing chlorine steadily into the water. The downside is that they work slowly and can lower your pH and raise your cyanuric acid levels over time.
Chlorine granules dissolve quickly, which makes them great for a fast chlorine boost. You broadcast them directly across the pool surface or pre-dissolve them in a bucket of water first. Just don’t dump them in one spot, since concentrated granules can bleach a vinyl liner or irritate a fiberglass finish. They can also raise your cyanuric acid levels, but it’s not as big an issue as with tablets.
Liquid chlorine acts the fastest of the three. You pour it directly into the water, and it gets to work almost immediately. It’s unstabilized, meaning it doesn’t contain CYA, so it burns off in the sun faster than tablets or granules. But it also won’t contribute to CYA creep over time. Liquid chlorine is also less potent than the other types, so it works well in smaller pools or for salt water pool owners who need to boost their chlorine. The trade-off is that liquid chlorine has a shorter shelf life and is heavier to store and handle than dry options.
A quick note on cyanuric acid (or CYA): this is the stabilizer that protects your chlorine from being burned off by the sun’s UV rays. Think of it as sunscreen for chlorine. We’ll cover it in depth in the protectors section, but just know it’s closely tied to your sanitizer choice.
You can mix and match these based on your situation. Many pool owners use tablets for day-to-day maintenance and switch to liquid chlorine if their pH or cyanuric acid levels are out of range.
If you have a salt water pool, you’re not adding chlorine regularly to the water. But you still have a chlorine pool. Your salt water generator converts the salt in your water into chlorine. Keep your salt level between 2,800 and 3,200 PPM, and the system makes your chlorine for you.
There are other sanitizers out there: bromine (more common in indoor pools and hot tubs), biguanide (a chlorine-free alternative), and supplemental systems like minerals, UV, and ozone. Most backyard pools run on chlorine or salt.
As for your target levels: in a standard chlorine pool, keep your free chlorine between 1 and 3 PPM. In a salt water pool, the same target applies. Your generator is just doing the work of hitting that range for you, and you’ll likely keep it around 3 PPM, and a bit higher in heavy use or high heat. If you use a supplemental system like minerals, UV, or ozone, you can run your chlorine a little lower, around 0.5 to 1 PPM, because those systems are handling some of the sanitizing load. That’s one of the main benefits of adding a supplemental system: less chlorine, same protection.
Group 3: Shock
Shock isn’t just a product. It’s a process. And there are two types.
Non-chlorine shock (potassium monopersulfate, or MPS) is an oxidizer. It doesn’t add chlorine to the water. What it does is break apart the “used up” chlorine, called combined chlorine or chloramines, and frees your chlorine up to keep sanitizing. This is great for weekly maintenance. After adding it to the water, you can swim again in about 15 minutes.
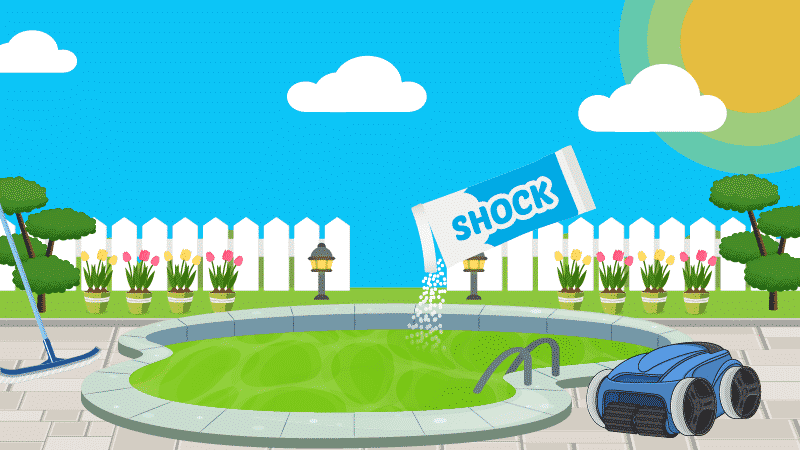
Chlorine shock is the heavy-duty option. It adds a concentrated dose of unstabilized chlorine to your water to kill algae, bacteria, or anything that’s gotten out of control. Use this after heavy pool use, after a storm, or anytime you’re dealing with algae or cloudy water. You’ll need to wait for your chlorine levels to come back down before swimming, usually overnight.
Calcium hypochlorite, or cal-hypo shock, is the most powerful option. But use dichlor shock or liquid chlorine if you have a salt water, fiberglass, or smaller pool. Check out our guide to the types of pool shock if you need more help deciding what’s right for you.
When you add chlorine shock to the pool, always add it at night so the sun doesn’t burn it off, and with the filter running.
Group 4: Protectors
This group doesn’t need weekly attention, but it protects your chlorine and your pool itself. The two chemistry measurements to pay attention to are cyanuric acid and total calcium hardness.
Cyanuric acid (a.k.a. CYA or chlorine stabilizer)
Without cyanuric acid in an outdoor pool, the sun’s UV rays will destroy your chlorine. You can lose half your chlorine in just 17 minutes. CYA protects your chlorine from that.
Your target for a regular outdoor chlorine pool is 30 to 50 PPM. Indoor pools don’t need it. For a salt water pool, aim a bit higher, 60 to 80 PPM, because your system is constantly producing chlorine and you don’t want your salt water generator working overtime.
Now, here’s who actually needs to add CYA to their water. If you use chlorine tablets (trichlor) or granules (dichlor), those already contain cyanuric acid. It builds up over time as you sanitize, so you may not need to add extra. But if you use liquid chlorine or have a salt water pool, your sanitizer contains zero CYA. You’ll need to add a chlorine stabilizer separately to protect your chlorine from the sun.
One warning: CYA doesn’t really break down quickly. It only goes up. If it gets too high, above 80 to 90 PPM, your chlorine becomes less and less effective. And the only fix is to partially drain and refill your pool with fresh water.
Calcium hardness
Your total calcium hardness protects your pool’s surfaces and equipment. Too low, and the water gets aggressive. It’ll start pulling calcium from your plaster, grout, or equipment to balance itself out. Too high, and you’ll get scaling and deposits.
Target ranges vary by pool type: 225 to 275 PPM for concrete pools, and 175 to 225 PPM for vinyl liner and fiberglass pools. For fiberglass, keep it on the lower end, since high calcium can cause scaling. And while vinyl itself doesn’t need calcium, low calcium is corrosive to metal parts like ladders and fittings. The good news is that calcium hardness is stable. You typically only adjust it once per season when you open your pool.
To increase your calcium hardness levels, use a calcium hardness increaser.
Like CYA, if it gets too high, you’ll need to dilute by partially draining and refilling. And check your source water if this is a common problem for you. Hard water will mean your calcium levels are high. Fill your pool with a hose filter or, if the water is really hard, with a water softener. A stain and scale preventer can help keep calcium from settling on surfaces if you’re not able to get your calcium levels in range.
Metal sequestrant or stain and scale preventer
Two more products are worth knowing about, depending on your water source and pool type.
Metal sequestrant is for anyone filling their pool with well water or hard water that contains iron or copper. Without it, those metals can react with your chlorine and cause staining on your pool surfaces: rust-colored stains from iron, greenish stains from copper. A metal sequestrant binds to those metal particles and keeps them suspended in the water so your filter can remove them, rather than letting them settle and stain. If you have well water, add a sequestrant before you add anything else when filling your pool.
Stain and scale preventer is a similar idea, but focused on calcium. If your calcium hardness is on the higher end, this product keeps calcium from depositing onto your pool walls, floor, and equipment as scale. It doesn’t remove calcium from the water (only diluting with fresh water does that), but it keeps it from causing damage in the meantime. It’s especially useful for fiberglass pool owners, where high calcium can cause fading and discoloration over time.
Group 5: Enhancers
Enhancers are optional. If your water is balanced and sanitized, you may never need them. But they’re good to know about.
- Clarifier clumps together tiny particles your filter can’t catch on its own, helping clear up cloudy water. It’s slow-acting but simple: just add it and run the filter.
- Flocculant does something similar, but instead of sending particles to the filter, it sinks them to the pool floor so you can vacuum them out. It’s good for severe cloudiness, but it requires more effort, and you need to be able to vacuum on the Waste setting.
- Algaecide is a preventative, not a cure. If your water has already turned green, you need chlorine shock, not algaecide. But it can help prevent algae when you’re going on vacation or not keeping up with the pool regularly.
- Enzymes break down oils and organic buildup so your chlorine can work more efficiently. If you’re constantly fighting water quality issues, enzymes can help before you reach for extra chemicals.
- Phosphate remover removes the food that algae eat: phosphates. If your water is circulating, your pool is clean, your water is balanced, and you’ve shocked your pool, you shouldn’t have an algae problem. If you’re doing all of that and you’re still fighting algae, a phosphate remover might be worth trying.
Again, if you’ve got your balancers, sanitizer, and shock dialed in, you may not need any of these. They’re a bonus, not a requirement.
The right order to test and adjust your chemistry
The order you add chemicals matters. Add them in the wrong sequence, and they can work against each other, or just not work at all. Always have your pump and filter running when you add chemicals, and wait at least 30 minutes between each one so it has time to circulate. Then retest before moving on. Some products, like calcium hardness increaser and muriatic acid, need an hour or more of circulation to distribute evenly, since you don’t want any hot spots in the water.
And never mix chemicals together outside the pool. Even residue left in a bucket can cause a dangerous reaction.
Here’s the order to follow:
- Metals first (if needed). If you have well water or suspect iron or copper in your water, add a metal sequestrant before anything else. Metals can react with chlorine and stain your pool surfaces. Getting them into suspension first protects your pool and your other chemicals. Check the product instructions, but usually you should add this 24 hours before adding anything else.
- Adjust total alkalinity. Get alkalinity in range before touching pH, because alkalinity directly affects how stable your pH will be. Raise it with an alkalinity increaser or baking soda. Lower it with
pH decreaser . - Adjust pH. Once alkalinity is stable, dial in your pH. This is critical before adding sanitizer, since chlorine works most effectively between 7.4 and 7.6. Raise pH with pH increaser. Lower it with
pH decreaser or muriatic acid. You can also raise your pH by aerating your water. Running a water feature, fountain, or aerator will raise pH without impacting alkalinity. - Adjust chlorine. Now that your water is balanced, add your sanitizer. If you’re using tablets in a chlorinator, they’ll take a few hours to bring levels up. Granules or liquid chlorine work faster. If you’ve got a salt water pool that you’re starting up, add a dose of liquid chlorine to bring up the chlorine levels so your salt water system doesn’t have to work as hard.
- Adjust cyanuric acid (if needed). Check your CYA levels and add chlorine stabilizer if needed. If you’re already using trichlor tablets or dichlor granules, you’ll get CYA in the water whenever you add chlorine. If you use liquid chlorine or a saltwater generator, add a chlorine stabilizer.
- Adjust calcium hardness (if needed). Add a calcium hardness increaser if your levels are low. If they’re too high, you’ll need to partially drain and refill or use a stain and scale preventer. Avoid adding calcium hardness increaser on the same day as alkalinity or pH balancers. It can cause calcium to come out of solution, leading to cloudy water and scaling. Wait at least 24 hours between adding these chemicals.
- Add shock separately. Don’t think of shock as part of the balancing sequence. It’s a separate step. If you have algae or cloudy water, use chlorine shock. Balance your pH and alkalinity before shocking so the shock works better. And if you’re using an unstabilized chlorine shock like Cal-Hypo, add it at night so the sun doesn’t burn it off before it can work.
Most chemicals come with dosing instructions on the packaging.
So that’s chemistry. It’s a lot to take in all at once, but remember: you don’t have to do all of it every week. Test your water, adjust alkalinity, pH, and chlorine in that order, and shock regularly. That’s your weekly routine. Everything else is maintenance and troubleshooting.
Your pool maintenance schedule
Those are the three C’s of pool care. Keep the water circulating and filtering, keep the surfaces clean, and keep your water chemistry balanced. Here’s what it looks like in action when you put it all together.
Your weekly routine
Do these in order, once a week:
- Check your water level. It should be at least halfway up the skimmer opening. Too low and the pump sucks air.
- Empty the skimmer and pump baskets. Check sooner after storms, or more often if you use a skimmer sock.
- Skim the surface. Use a flat net for quick skims and a leaf net for bigger debris. Every other day is even better.
- Brush the walls, steps, and crevices. Use nylon bristles for vinyl and fiberglass, and stainless steel for concrete and gunite. Get every dead zone, like corners and behind ladders.
- Vacuum the floor. Use a manual vacuum or a robotic cleaner. If you’re vacuuming algae or heavy debris, set your filter to Waste.
- Test your water. Check total alkalinity, pH, and free chlorine.
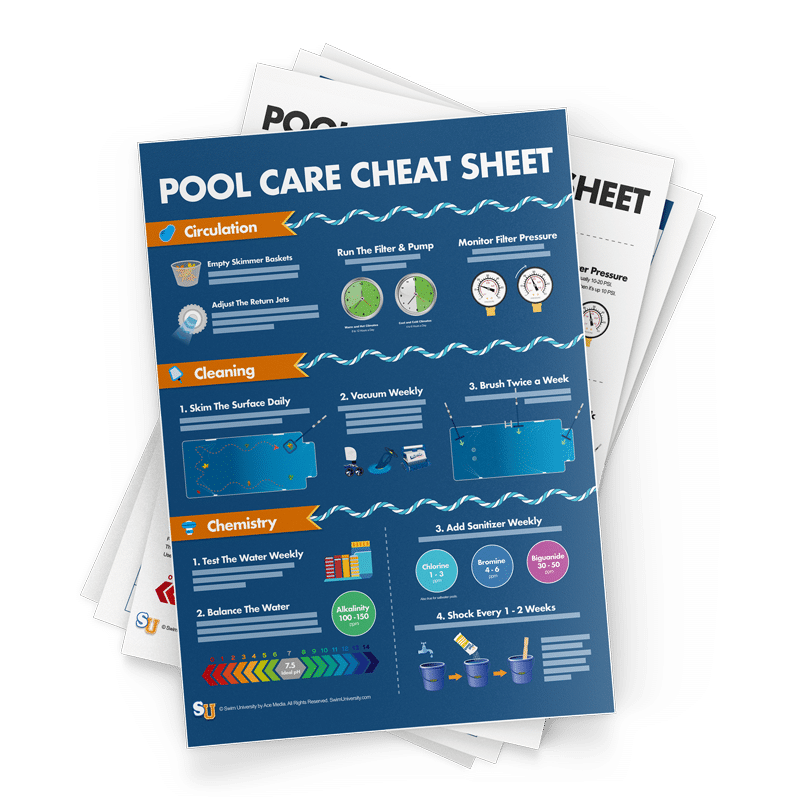
- Adjust in order: alkalinity, then pH, then chlorine. Wait 30 minutes between each chemical. Targets: alkalinity 80 to 120 PPM, pH 7.4 to 7.6, and free chlorine 1 to 3 PPM.
And every day, keep your pump running: 8 to 10 hours for a standard pump, at least 12 hours for a variable-speed pump, and longer in hot weather.
As needed
- Clean your filter when the pressure is 8 to 10 PSI above normal, or when your return jets feel weak. Backwash sand and DE filters. Hose down cartridges.
- Add non-chlorine shock when you notice a chlorine smell, eye irritation, or after heavy use. You can swim again in about 15 minutes.
- Add chlorine shock for algae, cloudy water, or after heavy use. Balance pH and alkalinity first, add it at night, and run the filter 24/7 until the water clears.
Once a month
- Test cyanuric acid. Aim for 30 to 50 PPM, or 60 to 80 PPM for salt water pools. If it’s above 80 to 90 PPM, a partial drain and refill is the only fix.
- Test calcium hardness. Aim for 225 to 275 PPM for concrete pools, or 175 to 225 PPM for vinyl and fiberglass.
- Clean the pool deck. Sweep and pressure wash. Use pool deck cleaner or TSP for slippery buildup.
- Wipe down ladders, railings, and slides with diluted white vinegar or pool surface spray.
- Inspect your heater for corrosion, buildup, and leaks.
- Inspect your salt cell (salt water pools only) for calcium deposits, and clean it every 3 months.
Once a season or once a year
- Deep clean your filter. Add filter cleaner to sand filters, soak cartridges overnight, and fully take apart DE filters.
- Lubricate O-rings with silicone-based lubricant, never petroleum jelly.
- Replace filter cartridges if they’re damaged or won’t come clean. Most last 3 to 5 years.
- Replace the sand in a sand filter every 3 to 5 years, or sooner if it’s clumped or greasy.
- Add a metal sequestrant before anything else when filling your pool with well water or hard water.
Two ways to make pool care easier
It’s a lot to take in all at once. So here are two ways to keep it simple.
Want a handheld version of all of this? Everything in this guide is in The Pool Care Handbook, and more, including a complete map of your pool’s plumbing and equipment. It’s an easy-to-use reference guide you can keep by the pool.
Want to be told exactly what to add? If you need extra help calculating your dosing, or you just want to be told what to add without doing the math, check out the Pool Care App. You enter your test results, and it calculates the exact dose for your pool. No charts, no guesswork, no overshooting. There’s a 7-day free trial, and then it’s just $49 a year. It’s the tool I wish I’d had when I first started caring for a pool.
Everything you just learned here is my way of doing things. I’ve been doing this for more than 30 years, and I’ve helped millions of pool owners along the way. I hope this helps you, too. Happy swimming!